Zur deutschen version / Switch to german version
Introduction: The Path to the most realistic NERF bolt-action blaster!
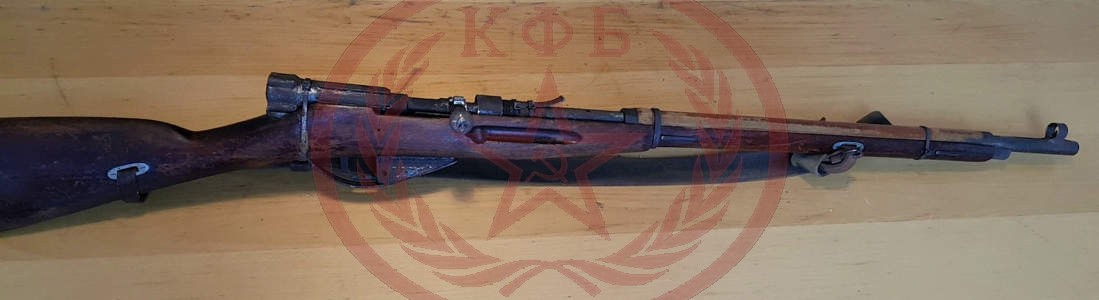
Many know the struggle: Dart blasters, that look as realistic as possible and also operate in a realistic fashion are basically nonexistent, unless you put a ton of work into them. But it could be so easy! Especially simple manual mechanical guns like Bolt-Action rifles and Pump-Action Shotguns wouldn’t be a problem to realize at all. Models like the Buzzbee hunter load only one dart or have very unrealistic proportions. So I put a ton of research and development to realize a custom solution that is as simple as possible to build, that looks like the real deal and also operates that way. It also packs quite a punch, but in LARP we want to keep the amount of bullets flying limited for gameplay reasons. By the way, the weight and look & feel of the wooden and metal parts combined with the stability of this build (you can bash a door in with it) are a huge pro in terms of immersion and usability!
Now this is the raw-tutorial. Of course, by the same principle you can also realize all other bolt-action models like the Karabiner 98k, Lee Enfield, Springfield, all kinds of hunting rifles and modern sniper rifles as well.
„Raw tutorial“, because the build is quite complex even if I can spare you a lot of the testing and mistakes that I had to do. It is not a step-by-step guide with exact measurements but more of a general workflow. I won’t cover every burr removal, etc. The materials list accordingly isn’t super precise either, as there can (and will) be a lot of improvisation and it would make this tutorial too messy.
If you want to start this build you need to have a minimum of handyman / craftsmanship experience and a ton of frustration resistance.
Material list
- NERF Sharpfire (Or Snapfire for a shorter action *UNTESTED)
- Tuning-Spring for NERF Sharpfire
- Original rifle stock (e.g. Mosin Nagant)
- Brass tubes for brass breech: KS 140, KS 141, KS 142
- Copper T-Connector 16 mm
- Copper or Brass tube for bolt-action lever.
- Ball end piece for bolt-action lever
- 1m Copper tube ca. 18 mm
- Screwed joint / buffing ca. 30mm
Tool list
- Metal saw
- Metal files
- Wood rasps
- Screwdriver
- Gaffa Tape
- Drill
- Dremel
- Sandpaper
- Soldering iron
- Hot glue pistol
- Epoxy glue
- The ability to properly operate these tools
Build time: Ca. 3 Days
If everything is prepared, you can start. By my experience it makes sense to split the build into three phases, with each phase taking roughly a day.
Build the most realistic NERF bolt-action rifles in three phases:
Phase 1: Modding the blaster
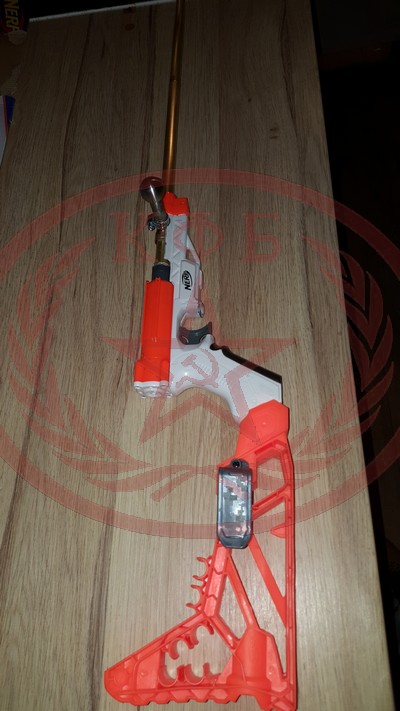
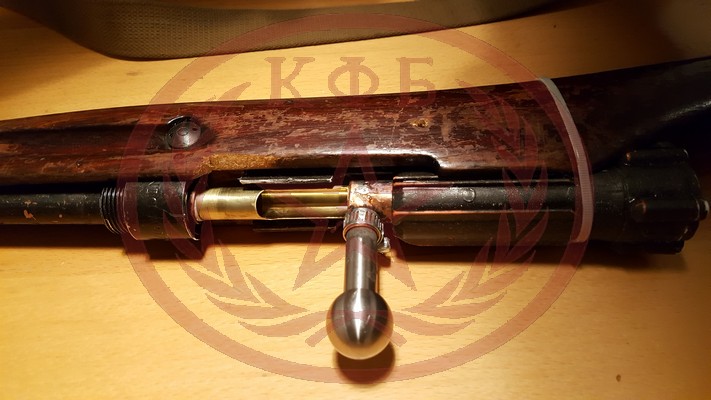
We start with the blaster. Since I used a snapfire, I will stick to this example. Note that all blaster except the Sharpfire and Snapfire are too wide to fit into a real stock, so your selection is limited to the two. Many blasters died to bring you this information. The spring mod is quite easy. Screw off the four screws on the back plate, take out old spring, put in new spring. Now comes the brass breech and removing the air restrictor. From the largest diameter brass tube we will make the moving parts of the breech that will be operated with the bolt-action lever. You need to make it long enough that you can completely cock the blaster.
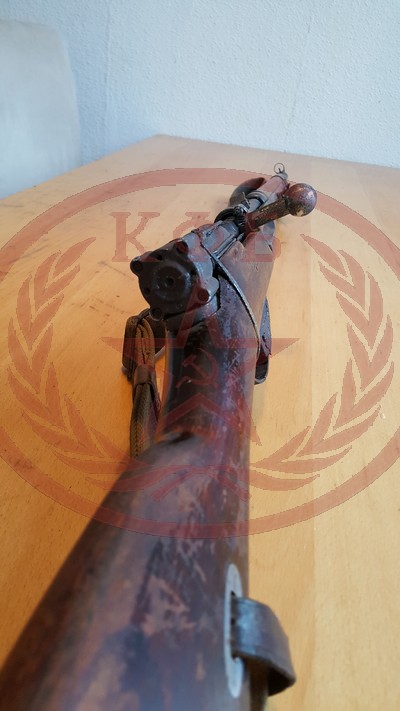
Make the lever out of brass or copper, as these can be solidly soldered. The solution with the pipe clamp I used wasn’t very stable so I had to glue it on, which is dangerous so close to the moving parts and breech. Its up to your fantasy where you can get a ball end piece for the lever. Just have an open eye for misuse and improvisation when you walk through your supply store 😉
Important to note about this: Don’t forget making the part a little bit longer for the bolt-action lever, as this obviously cannot be move into the cylinder!
The next smaller piece of brass tube will be our dart chamber / inline clip. That means this piece needs to be a bit longer than four darts. Using a dremel, cut out the opening of the breech. This should be around half a dart length or a tiny bit longer.
Important to note about this: Position the opening in a way that it is only exposed when the breech is open (bolt-action lever all the way back)! When repeating forward the entire tube must be cover the opening, and have at least 1 cm more to make sure its airtight. Measure the length so that when you open the bolt, the dart chamber still lies in the breech tube and doesn’t fall out. That means when the breech is open the chamber tube still sits in the breech tube.
Now comes the tight fitting tube made from the smalles brass tube. A dart fits here very snuggly and cannot move through the tube on its own. Start with a length of 2 darts and continually test fire and cut down the tube, until you don’t have blank shots or double-shots anymore. Make sure you completely reload before each test, as the amount of darts in the clip slightly changes the performance. But we need comparable results, so repeat every test faithfully. You can start with measuring the point, where the first dart gets stuck to get an initial impression of what to cut off in any case. Continually cut away to find the sweet spot, where you can fire a full magazine without blank shots or double shots. Be precise. I will have to repeat this step at some point…
Pro-Tipp: Drill an additional hole in the center of the cylinder cap (the one with the 4 screws) so that more air can escape. Otherwise upon shooting a vacuum can occur and slow down the plunger!
Pro-Tipp 2: Treat the inner front end of the cylinder and the moving parts with vaseline and silicon grease. That reduces friction and seals the cylinder.
I won’t go too much into detail about the blaster modding, as there are very good videos for modding the sharpfire on youtube covering the spring mod and brass breech.
Phase 2: Preparing the stock and creating the outer barrel
Preparing the stock
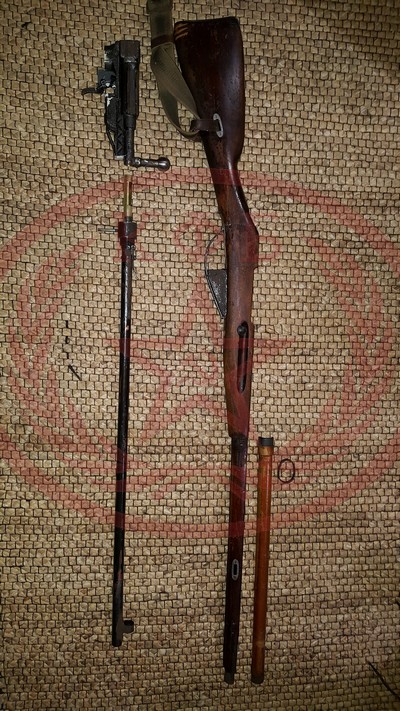
Preparing the stock mostly means rasping, sawing or in any other way removing a lot of material to make room for the remains of the sharpfire. I didn’t have to change anything in front, the outer barrel fitted perfectly to the stock assembly. Depending on your shaft you will have to come up with a way to mount your NERF, stock and outer barrel. I put a hole in the 30mm fitting, the whole assembly is held in place by only one screw! I also used a cable tie to secure the cylinder just in case. The remains of the sharpfire fit perfectly to the back of the assembly, so everything is stable and stays where it should.
Creating the outer barrel
I made the outer barrel from copper tube I bought at the supply store. You can use steel if you have the opportunity to weld. I recommend copper and brass as these can stably be soldered, the poor man’s welding. I cut of a ring from the tube of about a centimeter width, drilled through it and put a nail in. This will be my front sight. File both round surfaces flat where they shall connect and solder it on with a lot of solder. The back side can simply be made from a piece of brass or copper sheet metal, file in a notch in the center and solder it onto the barrel as well.
My barrel unfortunately only begins behind the breech. It would be better if that would lead all the way up to the cylinder and be cut (dremel) in such a way that it also leads the movement of the bolt. I think that might look better than my variant and also be a bit more resilient. When everything fits snugly and shoots correctly (test!), you can glue the brass breech into the outer barrel with epoxy. Make sure the epoxy only goes where its supposed to or you might ruin the inner barrel!
Phase 3: Optical tuning
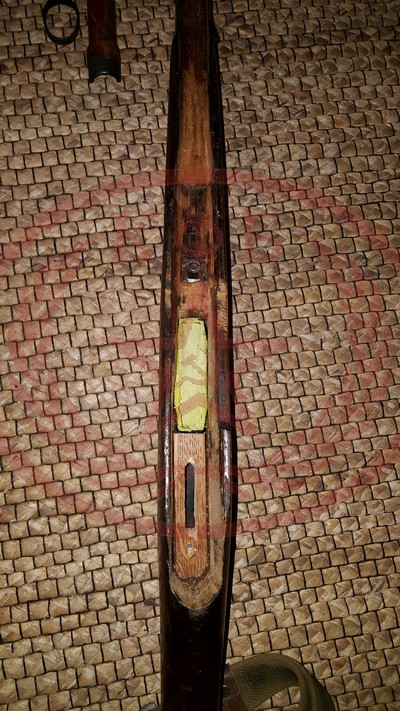
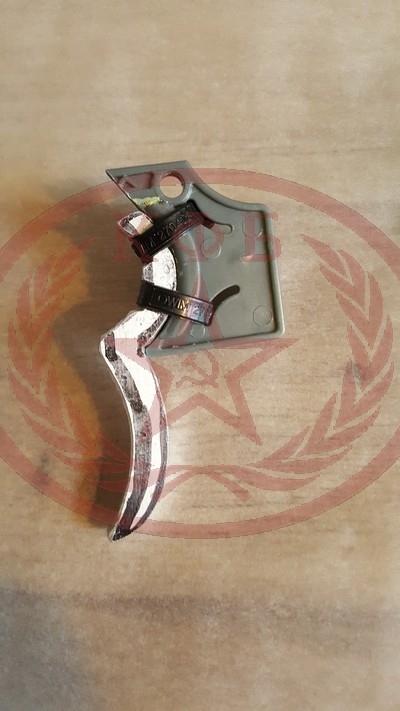
Put in a small piece of wood with a slot shaped hole to cover up the underside of the rifle and provide guidance for the trigger movement. This way you cant look into the underside. The extended trigger might move sideways otherwise.
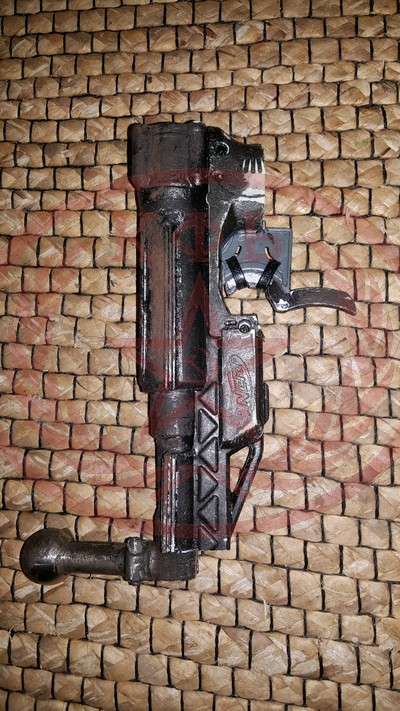
I made the fake magazine box from a strongly modded old buzzbee magazine filled with milliput, but you can use anything to build the dummy. Afterwards we have to bend the trigger guard from 2-4 mm sheet metal. When you got the shape right, drill holes in it and screw it fast to the dummy mag and the rifle stock.
For the plastic and metal parts I used a primer, then coloured it in one layer of black, then silver, then dark grey. Since I wanted a nice postapocalyptic style, I also used a special rust product. Obviously, there is no limit to your creativity when it comes to the optical modding.